Mixtable is an online spreadsheet, designed from the ground up to bulk edit and analyze Shopify data.
Got a question? We're here to help! Reach out at team@mixtable.com, and we'll get back
to you promptly.
Mixtable’s Import CSV file feature lets you bring CSV data into your Mixtable worksheet, update the exact rows and columns you want, and then sync those changes to Shopify when you’re ready.
If you’re making bulk updates to your Shopify store, importing a CSV into Mixtable can save you hours of work. Instead of manually copying and pasting values, you can match your CSV rows to the right items in your Mixtable spreadsheet, choose exactly which columns to update, and keep everything else unchanged. And because your worksheet is connected to Shopify, you can sync those changes back to your store with one click whenever you’re ready.
You can:
This selective approach is perfect for bulk updates like inventory levels, prices, product tags, and metafields when you only want to change certain fields without affecting the rest of your data.
Before you start, make sure you have the right worksheet open and your CSV file is properly formatted. This quick check will help the import go smoothly.
.csv fileNow you’ll launch the import tool from your workbook toolbar.
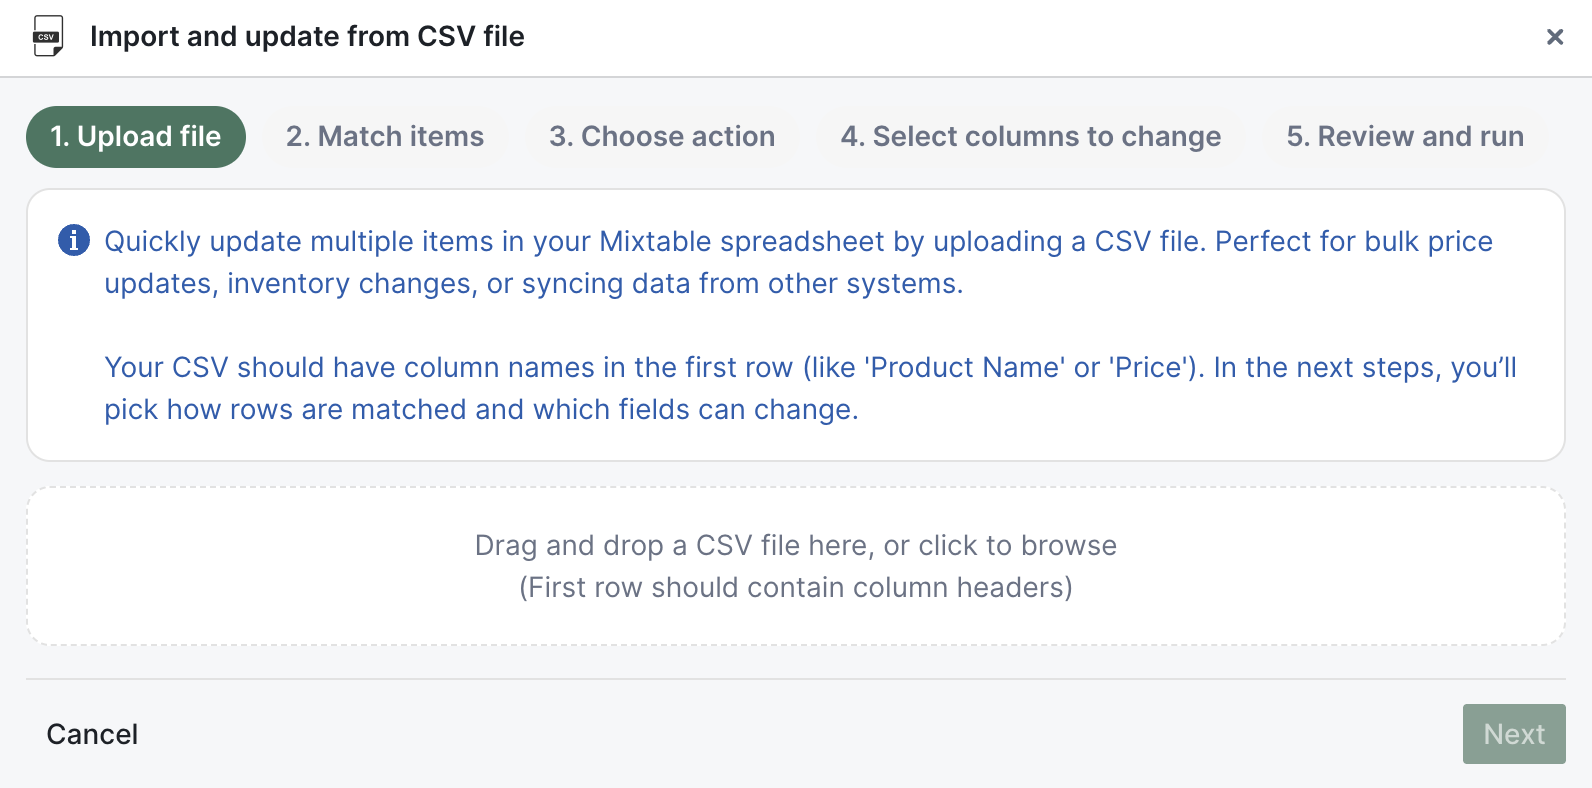
The dialog opens with the title Import and update from CSV file.
Upload your CSV file so Mixtable can read its contents and prepare it for import.
Mixtable will move you to the next step once the file is read.
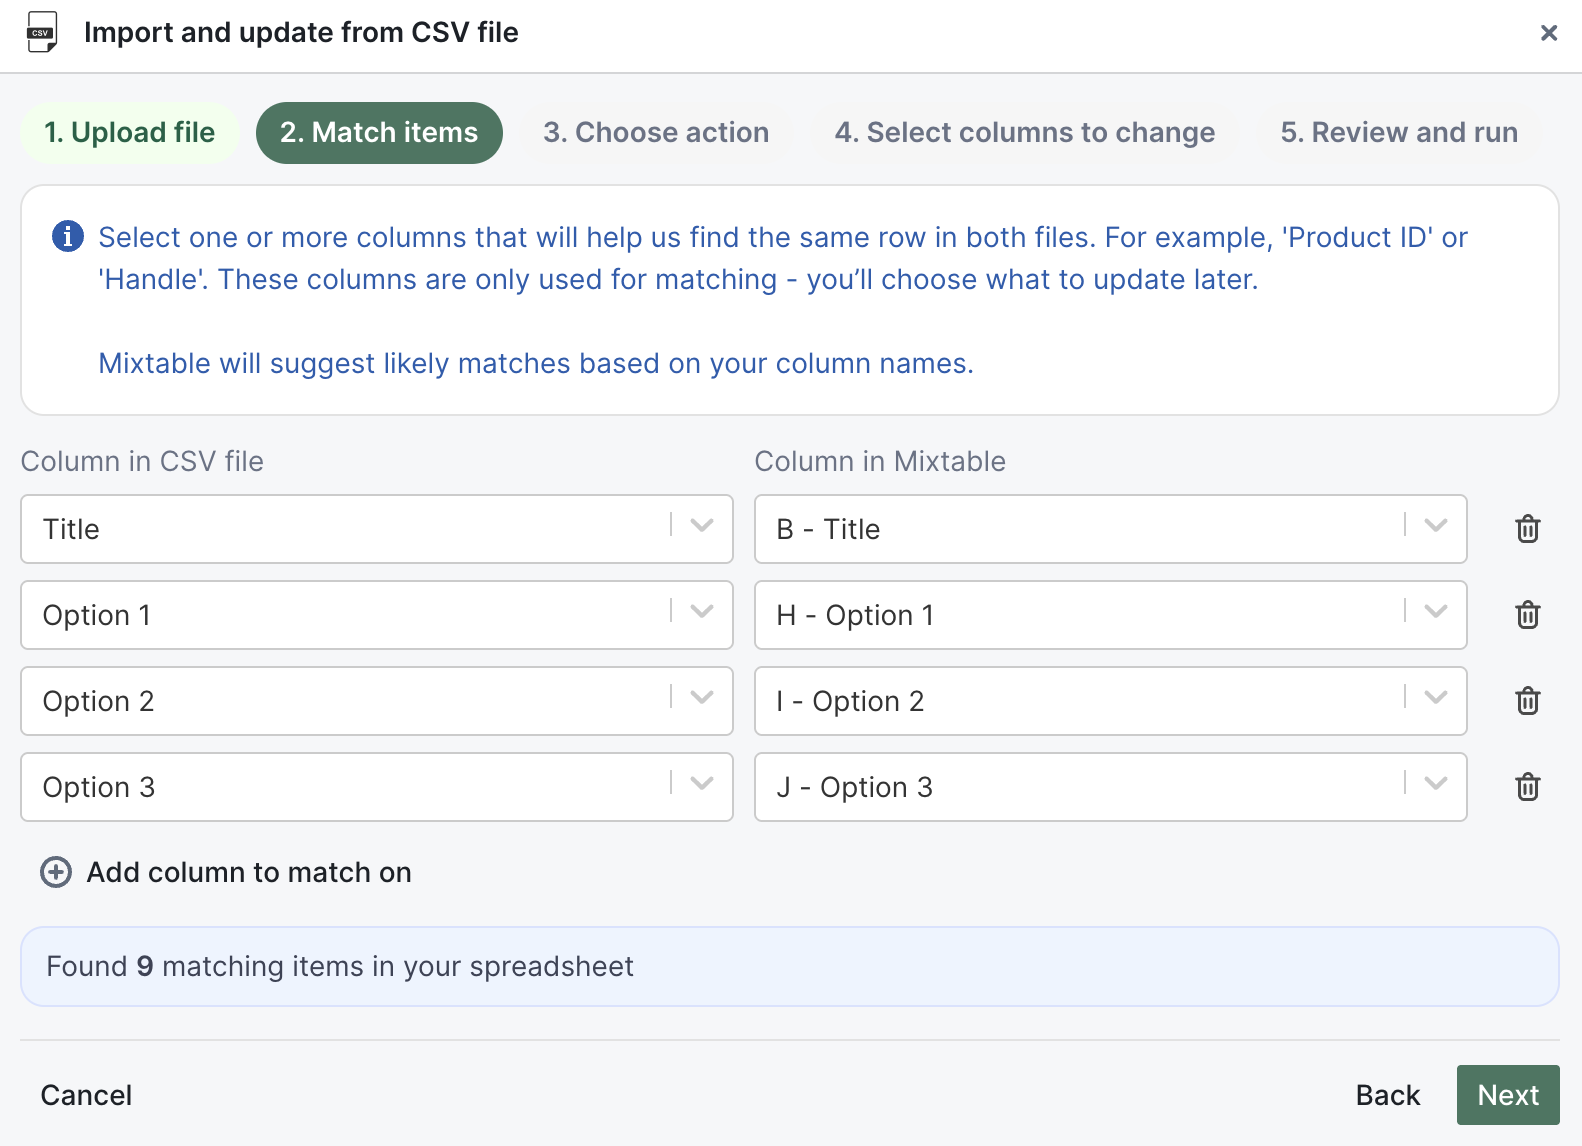
This is where you tell Mixtable how to identify which items in your CSV correspond to which rows in your worksheet. By choosing matching columns, you ensure updates go to the right place.
In step 2. Match items, choose how Mixtable should find the same item in both places:
Handle, SKU, or Product ID)Tip: Think of this as telling Mixtable “how to find the same item in both places.” For example, if you choose SKU in both files, Mixtable will match rows that have the same SKU value.
Important:
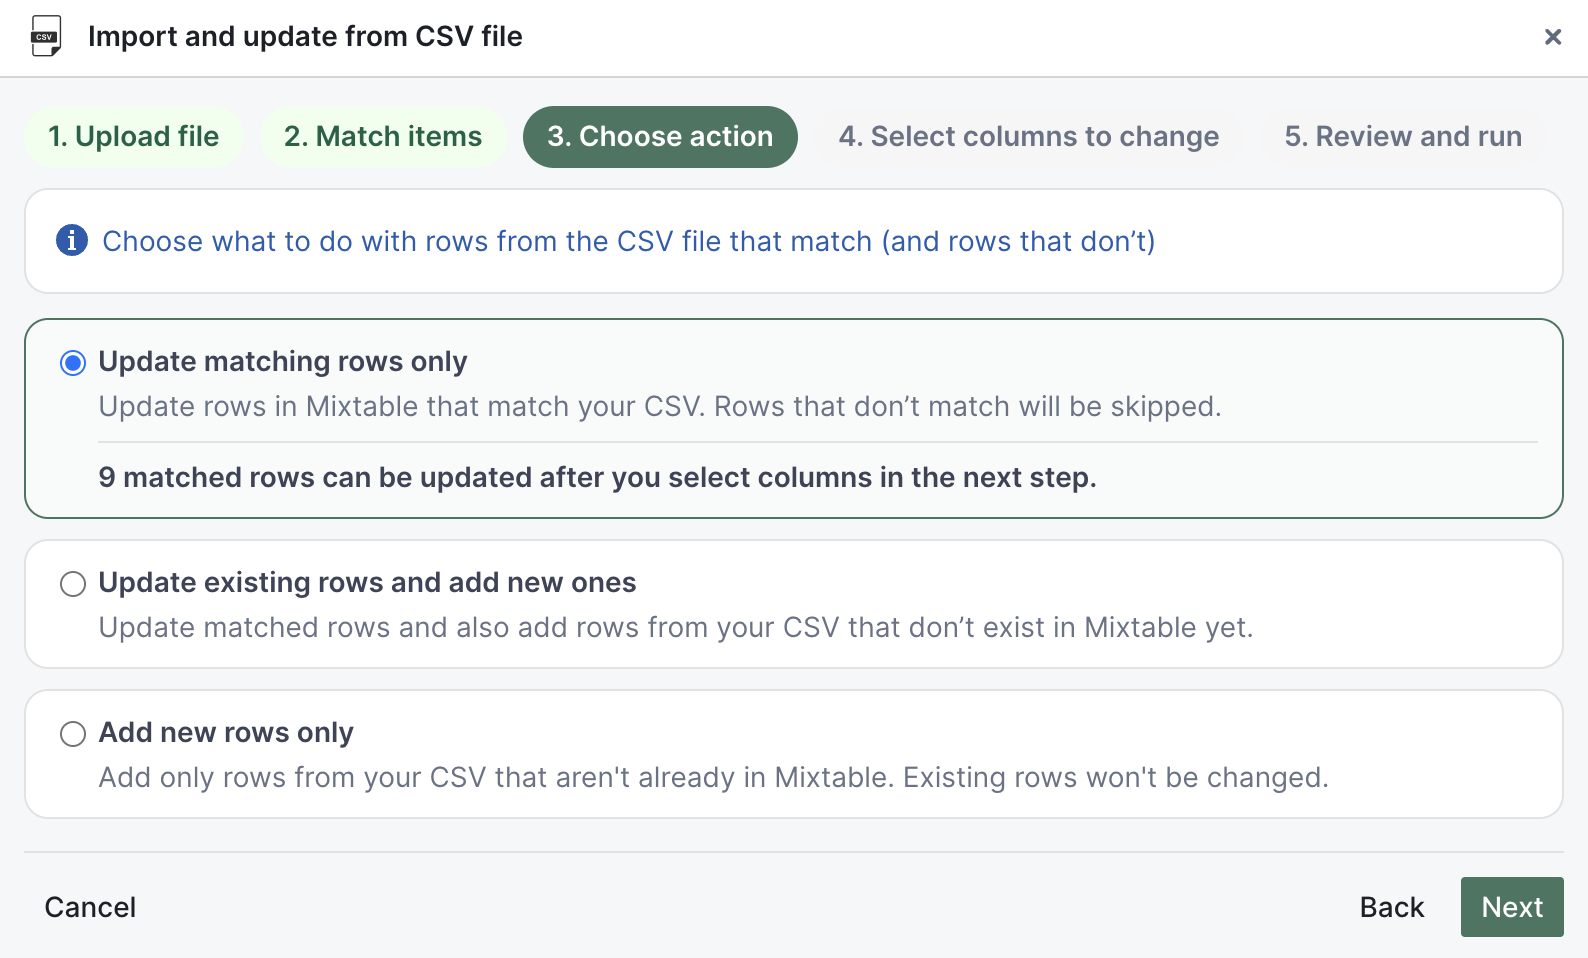
Decide what Mixtable should do when it finds a match—and what happens when it doesn’t. This gives you control over whether you’re just updating existing data, adding new items, or both.
In step 3. Choose action, pick one option:
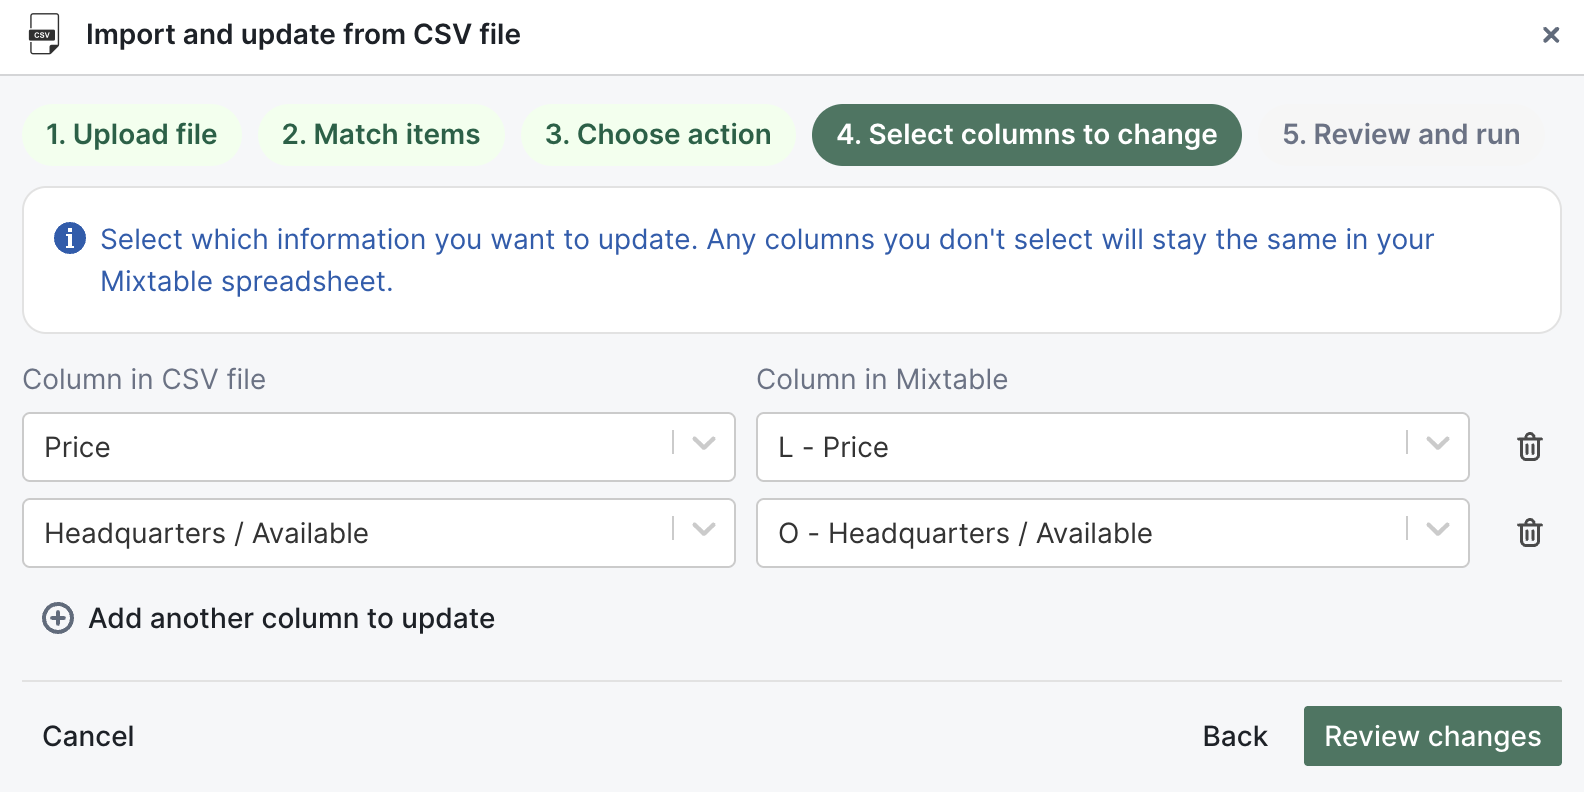
Now decide exactly which fields you want to update. This step gives you precise control—only the columns you map here will be changed in your worksheet. Everything else stays untouched.
In step 4. Select columns to change:
For example, if you only want to update inventory and price, map just those two columns. Your product titles, descriptions, tags, and all other fields will remain unchanged.
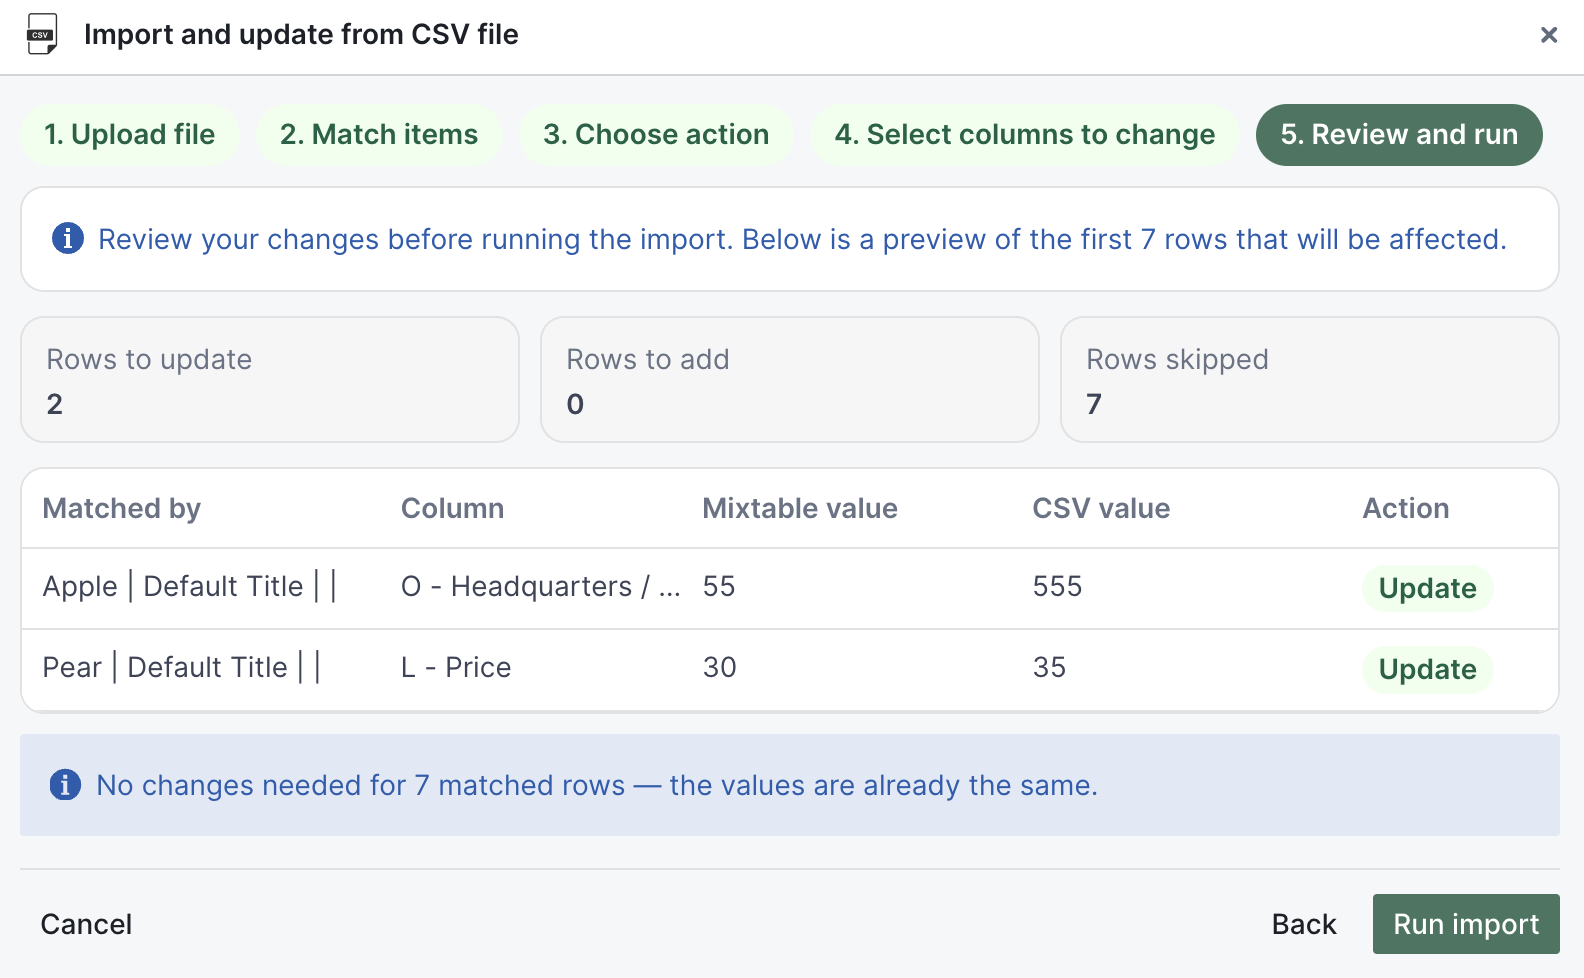
Take a final look at what’s about to change before you commit. The preview shows you exactly which rows will be updated, which will be added, and which will be skipped.
In step 5. Review and run:
Use this when you have new products in a CSV that don’t exist in your store yet and you want to add them through Mixtable.
This approach lets you review and verify all product details in your Mixtable spreadsheet before pushing them live to Shopify—giving you a safety net to catch any mistakes or make last-minute adjustments.
Handle, Title, Price, Description, Vendor, and any other product fields you want to setHandle to the Mixtable handle column (or use another unique identifier like SKU or Product ID)Title → Mixtable TitlePrice → Mixtable PriceDescription → Mixtable DescriptionVendor → Mixtable VendorResult: The new products appear as new rows in your Mixtable worksheet with all the mapped columns populated. Your existing products remain unchanged.
Next step: Review the new product rows in your worksheet to make sure everything looks correct. When you’re ready to publish these products to your Shopify store, click Sync worksheet changes to Shopify.
If you only want to update inventory for five products:
SKU to the Mixtable SKU columnInventory - New York, Inventory - Los Angeles, and Inventory - Chicago)Result: Rows are matched by SKU, and inventory values are updated only for the three mapped location columns.
Use this when your worksheet is Products (with variants) and you want to update variant prices from a CSV.
SKU and Price)SKU to the Mixtable SKU columnPrice to the Mixtable price column you want to updateResult: Rows are matched by SKU, and only the mapped price column is updated for matching variants.
Use this when your CSV has one row per product and you want to update several metafields in one import.
Product Title column plus five metafield columnsProduct Title to the Mixtable product title columnResult: Mixtable finds products by title, then updates only those five mapped metafield columns for matching rows.
Use this when you want to refresh product search metadata and merchandising tags in one import.
Handle, SEO Title, SEO Description, and TagsHandle to the Mixtable handle columnSEO Title to Mixtable SEO title, CSV SEO Description to Mixtable SEO description, and CSV Tags to Mixtable tagsResult: Matching products are found by handle, and only SEO title, SEO description, and tags are updated.
The CSV import updates your Mixtable worksheet, but doesn’t automatically sync to Shopify. To apply these changes to your store, click Sync worksheet changes to Shopify once the import finishes.
You're ready!
Mixtable is an online spreadsheet designed to sync data with Shopify. It looks, feels, and behaves like Excel (including formulas), but runs in your browser. With Mixtable you can:
Best of all, you can sync changes back to Shopify with a single click. Find out more about the Mixtable suite of products here.